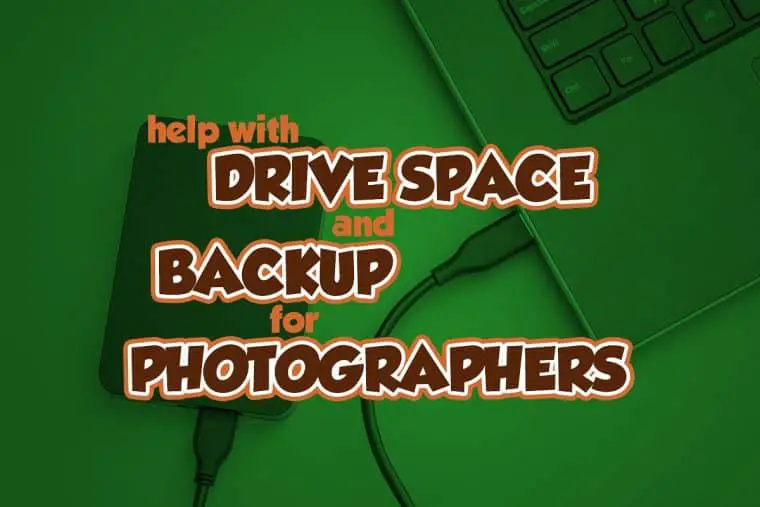
Hard Drive Space Problems for Photographers
Let’s talk about the problems that photographers face with hard drive space. The more technical term for that is “storage”. Don’t confuse this with “memory” or “RAM”. Memory is a form of storage but it only stores information while your computer is on. Memory today comes in sizes like 8GB, 16GB, 32GB or more. The storage we are talking about here is the drive inside your computer that stores information even after your computer is powered off. Today the common sizes of that drive in your computer is 256GB for a small one, 512GB, 1TB, 2TB or higher.
In the past the drive in your computer was something you could upgrade. You could replace the drive that came with your computer with something bigger and/or faster. Today that is much the case. Today with Macs it is pretty difficult to upgrade the drive that comes with the computer, most photographers will be stuck with whatever they bought when they ordered the computer. PCs have traditionally been a little easier to work with here but the trend for a laptop PC is to make this not something that is well supported.
We end up with a resource in our computers that is limited. There are lots of things that take up space on that drive. This isn’t something unique to photographers, tends to be an issue for anyone using a computer, but photographers accelerate their need for more storage beyond what came with the computer quickly.
Because photographers tend to need help here quickly, I have done numerous episodes on this topic over the years.
- https://phototacopodcast.com/photography-and-storage/
- https://phototacopodcast.com/photographers-guide-to-raid/
- https://phototacopodcast.com/ultimate-guide-to-backup-for-photographers/
- https://masterphotographypodcast.com/ip-roundtable-2-15/ (Hard Drive Storage Talk with Jim Harmer)
There are two major problems photographers face with regard to storage. One comes pretty early on in their journey, the second takes a bit more time. Both are significant enough problems I have referred to them as “walls” and photographers slam into these walls. I like the visual of a photographer slamming into a wall with these storage issues.
There are really good solutions for that first wall, but they tend to be very technical and there are so many options I see photographers get bogged down with analysis paralysis regularly. They don’t know what to do. I want this to be a resource to provide guidance for photographers struggling with managing their storage but by no means will my advice and recommendations here be the ONLY way to do things.
The First Storage Wall For Photographers
The first wall for most photographers is the moment when they go to import their photos from a shoot to the computer and the computer tells them they are out of drive space. When you see that it means you have run out of space on that drive inside your computer. There is only so much that can be stored in the drive and you have filled it up so that it can’t store any more.
This is something photographers run into much faster than non-photographers. You can store hundreds of thousands of documents and spreadsheets on a computer. In fact, those kinds of things tend to be so small there is a large percentage of people today storing those kinds of things in the cloud rather than having them on their computer.
Photographers on the other hand start out storing JPEGs on their computer, which are significantly larger than an averaged sized document, spreadsheet, even slide deck. Where a smaller sized drive for a non-photographer is likely to be fine for years, it is really easy for a photographer to create enough images that they fill up that drive that came with the computer.
Things only get worse as photographers begin shooting raw. If you didn’t run into drive space problems while shooting JPEG, you will get there in a hurry when shooting raw as raw files are about 10 to 20 times larger than JPEGs. Then there are PSD/TIFF files that photographers tend to produce that are even larger. Not to mention things like previews and catalog files.
All of it adds up really quickly to photographers running out of disk space. Let’s go through some solutions and I’ll share my guidance on what I think photographers should do when they slam into this first storage wall.
First Storage Wall Solution #1 – New Computer
Buying a new computer is a common approach to overcoming the first storage wall. We used to solving similar problems the same way. If we fill something up, we buy another of that thing so that we can start over on filling it up again. Depending on what that thing is, you might need to have only one of them and when you buy a new one you have to get a bigger one so that you can move what filled it over to the new one and still have room.
Honestly, this solution often makes sense for photographers. Most photographers have a computer before they got into photography, but they quickly discover that it doesn’t work well for editing photos. Maybe it is older. Maybe it was bought for just working on documents, spreadsheets, slides, and browsing the Internet.
Whatever the case, most photographers put up with computers not being fast enough to support editing photos well for a while and then when they get this message that their drive is full it is kind of the last straw. If that is the situation, getting a new computer may be a good one to temporarily solve the problem.
However, photographers shouldn’t expect that buying a new computer is going to solve this problem for very long. Most computers today don’t have enough drive space for it to solve the problem for more than a few months, maybe a couple of years. With Macs in particular, I don’t think it is worth the SIGNIFICANT cost increase to max out the drive space as you buy the computer.
To me that suite spot of price to drive space for photography is 512GB. That is usually an upgrade you have to choose as you price out a computer but I think that is something most photographers would benefit from. If the next upgrade to 1TB is in the budget, it can make sense to opt for that size. Going to 1TB is usually pretty cost effective but I would advise you to spend your budget in other places first.
2TB gets pretty expensive where the cost outweighs the minor benefit of extra storage. The reality is that most photographers need more than 2TB of storage and there are much less expensive ways to add that storage to any computer. Some manufacturers, Apple in particular, offer upgrades to even bigger drives when you buy a computer, but the prices for that tend to be outrageous or even insane. I don’t recommend any photographer overspend on a drive that is larger than 2TB as they buy a computer.
First Storage Wall Solution #2 – External Drives
An obvious solution to most photographers, this probably isn’t a new thing for most. I have also heard from many photographers their concern that storing their images on external drives is going to slow down their computer and make editing their photos painful. This certainly can be the case, or is used to be the case.
This is a little technical here, but stick with me. A while ago computers came with an assortment of ports, ways to attach keyboards, mice, cameras, or drives. Some of those ports used to be very slow. They were fine for a lot of things like keyboards, mice, and even webcams, but were not good for drives. There was USB 1.1 and 2.0 and drives connected through those ports were slow enough they did impact the speed of photo editing software.
Today I don’t know of any laptop that comes with these slow USB ports, though some may have them to plug in a keyboard and mouse. There are three things that identify the port as being fast enough to not be a problem with an external drive:
- Blue on the inside of the port
- “SS” somewhere near the port
- The port is really thin (USB-C)
Despite what you may have heard elsewhere, If you use a port like that with your external drive, you won’t be slowing down your editing software. Even if you use a larger but slower magnetic spinning drive instead of the faster SSD drives. I didn’t expect that to be the case, but I tested that in Lightroom Classic pretty thoroughly and you can check that out in the Performance of External Drives with Lightroom Classic Photo Taco episode.
How Photographers Should Choose A Budget External Hard Drive
Once photographers are convinced they should store their images on an external drive, the next question I get is which external drive they should buy. There are so many choices it can be a little overwhelming and so many get worried they will buy the wrong thing because they don’t understand what all of the technical numbers about the drives mean.
If you are looking for the most budget friendly solution here are the key specifications photographers should look for in an external hard drive:
- New, not used/refurbished
- USB 3.0/3.1 or Thunderbolt
- 7200rpm (5,400rpm isn’t the end of the world, but 7200rpm is worth paying for)
- 2TB or larger capacity
The next question I get in the budget category is if there is a brand I recommend. I hear all the time that photographers worry they will pick a brand that produces bad drives but I don’t think brand really matters.
Despite what your friend/co-worker/neighbor may tell you about their terrible experience with brand X, those are all anecdotal experiences. Even if they have bought 10 or 20 different drives over the years, that is a sample size far too small to either confirm or condemn a hard drive brand.
For years now massive cloud backup provider, BackBlaze (we will talk about in a bit), has published a quarterly report of all the drives they have purchased. The report covers hundreds of thousands of drives, and while there have been drive models here or there that have higher than average failure rates there really hasn’t been a constant pattern of a brand that makes bad drives.
Photographers should pick the external drive that has the best price per GB. So long as it has the specifications listed above, choose whichever has the best price for the storage size you are looking for from any of the following major brands I trust:
- Crucial
- G-Technology
- Samsung
- SanDisk
- Seagate
- Toshiba
- Transcend
- Western Digital (WD)
Photographers also need to decide between a mobile and a portable version of the hard drive. If you aren’t going to be taking this drive with you out on the road, go with the desktop version. A desktop version does require an external power connection, which can be a pain, but they are less expensive and more likely to last longer than the portable version.
In fact, if portable is what you are after photographers should really look into the faster/tougher SSD option below.
Here are some links to searches for hard drives that meet all of these criteria (Adorama affiliate links):
- Search for portable drives
- Search of desktop drives (my preference unless you REALLY need them to be portable)
For those of you looking for a specific recommendation, if I were buying an external drive here in early May 2021 I would choose one of the following depending on the size of the storage needed (Adorama affiliate links):
- Seagate Expansion Drive USB 3.0 (portable) 2TB or 4TB
- WD My Passport USB 3.2 (portable) 2TB or 4TB
- Seagate Expansion Desktop USB 3.0 4TB-16TB
- WD My Book Desktop USB 3.0 4TB-10TB
How Photographers Should Choose A Faster External Drive
If you are ready to spend a little bit more than the budget picks above, you can get drives that are both faster and more resilient. You shouldn’t expect massive differences in the speed of your editing software using one of these over the drives above, but there will be a minor performance improvement and they are more portable and more durable.
Photographers should look for the following:
- SSD
- Portable
- USB 3.0/3.1/3.2 or Thunderbolt (500MB/s or better)
- 1TB or 2TB (4TB ar available but way too expensive)
The same list of brands above should be your guide or you can use this search to find the best price from one of them here: https://amzn.to/3xWC7ia (Amazon affiliate link)
If I were buying an external SSD here in early May 2021, I would choose one of the following (Amazon affiliate links):
- Crucial X6 Portable SSD USB 3.2 1TB or 2TB
- Samsung T5 Portable USB 3.1 1TB or 2TB
- SanDisk Extreme Portable USB-C/USB 3.1 1TB or 2TB (my personal favorite)
There are external SSD drives that are even faster (2x faster) and larger than these, but in the testing I have done there isn’t much difference between the slower drives above and these so it really isn’t worth spending significantly more money on those drives for photo editing. If you are going to do any video editing then it will be very worth spending the money for the faster drives.
What About Internal Drives and Thumb Drives?
I have already talked about how on laptops you aren’t likely to have much of a choice for replacing the drive in the computer or adding a second drive. There are still a few out there, but for the most part the computer isn’t designed to allow for the user to do that. The same is true for most Macs. However, PC desktops are very different here because nearly all of them allow for drives to be replaced and/or added with a little know how.
I am not going to cover that here because if that is you, a photographer using a PC desktop with a little know how, you don’t need me to offer any advice. The brands above still apply but you aren’t likely to need my help with this.
If you are a photographer using a PC desktop without the know-how, going with the external drives above will be the easiest. Though it really isn’t that hard to learn how to add a new drive to your desktop.
The other question I have seen is if the much less expensive USB thumb drives can be used for storing photos. They are super appealing, being so small and inexpensive. Wouldn’t it be lovely to only have that sticking out of your laptop computer instead of the rather large drives I have talked about so far?
These little sticks of storage are great for transferring images from one computer to another, or sharing images with family and friends, but I highly discourage using them for editing your photos. USB thumb drives are not built for this kind of load and demand that will be placed on them as photographers edit photos. You are headed for losing your images very quickly as a thumb drive will rapidly fail using it this way. Don’t do it.
How Photographers Should Do Backup Initially
Now that we have talked about a good way to solve that initial problem with running out of drive space, we can’t move on to the next storage issue until we talk about backup. Just like there is more than one way to solve the problem of expanding storage, there is more than one way to implement backup. I think photographers should take care of backup at the same time as they are expanding their drive space.
Regardless of how active you are as a photographer, you need to spend the time and money to do backup. This isn’t something just for professional photographers. Hobbyists really need to do backup as well. Here is how photographers should do that until they hit that second storage wall.
A 3-2-1 Backup Is Essential
I have talked about this in the ULTIMATE Guide to Backup for Photographers, so I won’t spend much time here, but here is how every photographer should think of their images with regard to backup. Your image does not exist until it is stored in 3 places, with 2 of them local but on different mediums, and 1 of them offsite (cloud).
Now let’s break that down a little in terms of the expanded storage I just went through. You come back from a shoot with your images on a memory card. Maybe you are lucky enough to have a camera that will write the image to two cards at once, which is great, but let’s ignore that for now. Your image exists in only one place, on that memory card.
After you copy that image to the drive on your computer, could be the internal drive or the external drive I just talked about, the image is now stored in two places. One copy of the image is still on the memory card, and another is on the drive. We have two copies on different mediums, but we don’t have a copy offsite. This is a safer position to be in than only having the image on the memory card, but we still don’t have 3-2-1.
There are lots of ways you can get that offsite backup created. Some manual things can work great, I have heard from plenty of photographers doing that very successfully. It doesn’t work for me at all. The offsite storage of my image has to happen automatically and the easiest way I have found to make that happen is licensing software and cloud storage that will automatically upload all of my photos to the cloud.
I’ll share some specifics in a minute, but let’s assume you have done that. You have set things up so that every image you copy to your drive is automatically copied up to the cloud. Now you have a 3-2-1 backup. Your image exists on the memory card, on the drive, and in the cloud. 2 of them, the memory card and the drive, are local but different mediums. One is offsite, in the cloud.
Problems With 3-2-1 Using a Memory Card
Hopefully that illustration makes sense of what I mean by a 3-2-1 backup solution. The problem is that most photographers want to re-use that memory card on multiple shoots. Though I have heard of photographers never deleting images from that card for this very reason, this is one copy of their 3-2-1 backup. If that works for you, that is better than not doing the full 3-2-1 backup, but I don’t recommend it.
I am continually impressed with how resilient memory cards are these days. There are some brands that have gone to great lengths to make them even more resilient than others, though I want to run some tests myself to compare those. Regardless, I wouldn’t want to trust one of my backup copies for my images to the resiliency of memory cards. They are more easily lost and more easily broken than external drives.
Use Two External Drives As Part of a 3-2-1 Backup of Photos
If the memory card is not the best way to do this 3-2-1 backup, how should photographers do 3-2-1? So glad you asked. When you buy that external drive to expand your storage, buy two of them. One of the drives will be used just like we talked about where you will be copying your images from your memory card to it for editing. Let’s call this drive 1, just so I can refer to it easily. The second drive needs to be at least as big as the drive 1. Let’s call this drive 2.
Photographers should think of drive 2 as being untouchable. You will never directly save anything to that drive. Not documents, not spreadsheets, not music, nothing. To you as a human using the computer, drive 2 doesn’t exist. Drive 2 exists solely to store a second copy of the images you put on Drive 1. This is why I don’t recommend thinking you will backup other things to this drive, like it being your Time Machine drive.
NOTE: For photographers using PCs who may not know, Time Machine is Apple’s backup system that will make backups for your Mac. Windows has a similar solution built into Windows 10 that few people know about. Most external drives come with software that can do this as well.
If you want to use Time Machine or Windows backup to backup your computer, my advice is to use a third drive for that. I know, I know, we are talking about a lot of drives here, that can seem pretty expensive and confusing. For the average photographer having multiple drives is going to be easier to figure out the technical solution for having multiple types of backups going to the same drive.
Local File Cloning and Cloud Backup Software To Automate 3-2-1 Backups
Let’s talk about software that can help photographers automate a 3-2-1 backup. Like I mentioned previously, if you think you can do a manual backup process, you may not need any special software. If that works for you, great! I know for me that will never work.
I have tried a manual 3-2-1 backup in the past. I manually copied files from drive 1 to drive 2 and manually copied files from drive 1 to a third drive that I would put at my parents house. Still satisfies all of the requirements of a 3-2-1 backup, but it means a failure would lose all the files since the last manual backup was done and with it being manual I didn’t do it nearly often enough. Manual definitely doesn’t work for me and I don’t recommend it.
I think for a 3-2-1 backup to actually work for photographers the process needs to be automated. I recommend photographers invest in two software solutions to automate the process.
- Local File Cloning. Software that will automatically clone files from drive 1 over to drive
- Cloud Backup. Software that will automatically backup files from drive 2 to the cloud.
Don’t Use Time Machine, Windows Backup, or Free Backup Utilities!
Like everything else covered thus far, there are lots of options available for photographers to automate a 3-2-1 backup. Some of them are even free. For example, Macs come with Time Machine and Windows comes with Windows Backup that could be used for local file cloning without any licensing cost. However, I recommend against either solution for photographers wanting to automate a 3-2-1- backup of photos.
Neither Time Machine nor Windows Backup do a simple file clone from drive 1 to drive 2. These are both backup tools that use a proprietary format to create backup files where your images go inside those files. Think of it like putting your photos in a massive zip file except it is one that can only be opened up by the application that made it.
With Time Machine/Windows Backup/other Backup software, if drive 1 dies you can’t just point Lightroom to drive 2 and have everything look just like it was. Instead you have to buy another drive and then use the application that made the backup on drive 2 and restore the files to the new drive 1.
Don’t get me wrong, this kind of backup works. It can be part of an effective 3-2-1 backup, and is the right price for many, but this doesn’t work for me. At least not for backing up my photos. I would use these tools for backing up my computer, but I don’t recommend them for automating a 3-2-1 backup for your photos.
While there are some advantages to these backup solutions (versioning and compression), there are some massive downsides that matter a lot to me. One of the biggest being that the images are trapped inside a proprietary file. If that file gets corrupted somehow, you lose access to every file inside it. You don’t just lose one or a handful of photos, you would lose them all if you can’t open up that backup file.
Another huge downside is the changes that Apple and Microsoft make to these backup systems over time. Both Macs and PCs have had times in their history where updates have caused the backups to not function. For example, there have been some pretty massive struggles with Time Machine as photographers have upgraded from Mojave to Catalina and BigSur. Most of the time people didn’t know there was a problem until they needed the backup only to find it entirely unusable. They lost everything even though they had tried to make backups.
These same issues apply, and are worse, for the backup software that comes for free with most external drives. Just like Time Machine and Windows Backup, most of them also create proprietary backup files your photos are stored in. If you want to use a backup tool to automate your local file cloning, use the one that came with your computer and not what comes with a drive. Apple and Microsoft at least attempt to make their tools work well and maintain them over time, that is really not the case with a free tool coming from a hard drive maker.
Use Time Machine, Windows Backup, or other backup software to backup your computer. Those tools were built for that purpose. I just don’t think backup software should be used as the “2” part of the 3-2-1 backup of your photos.
How To Choose Local File Cloning Software
If Time Machine, Windows Backup, and software from a drive maker aren’t good solutions to automate the local cloning of 3-2-1 backup, how should photographers find software that is? Here are the features I recommend photographers look for as they are choosing local cloning software:
- Runs in the background on the computer continuously (or nearly continuously as in multiple times a day or at least daily) monitoring for files that need to be cloned from drive 1 to drive 2.
- The files are cloned in the same folder structure on drive 2 as they are in drive 1.
- All of the images are directly accessible without any special software to “restore” them.
- Only new or updated files are cloned from drive 1 to drive 2. The software is smart enough to know that files that are already on drive 2 and are unchanged on drive 1 don’t have to be cloned again. The software can also ignore files being deleted from drive 1 and not delete them from drive 2 (often called one-way sync).
- The software validates every bit and byte of the image file on drive 1 made it to drive 2. This might be called a “checksum” validation or “verified copy”.
Both Macs and Windows come with built-in utilities that can meet all of these requirements. They can work very well, but they aren’t pre-packaged into a single easy to use solution. It takes some knowledge of how to put a few tools together that most photographers don’t have. If you have the skill set to use utilities like rsync, cron, xcopy, or task scheduler then you don’t need my help to get this going.
A quick note on requirement 4. One of the ways photographers lose photos is by accidental deletion. I have had many contact me with very sad stories about making a mistake in deleting photos they thought they had elsewhere or because they thought they were deleting different photos. Doing a one-way sync of photos where new and updated photos are cloned from drive 1 to drive 2 but deletions from drive 1 do not delete images on drive 2 is something I highly recommend.
This does waste disk space, which is probably the reason for deleting them off drive 1 in the first place, but having something in place where you actually have to double delete before the images are gone (delete from drive 1 and then purposefully delete from drive 2 as well) is something I find extremely valuable.
For those who don’t want to search for software that meets these requirements, my recommendation for Windows is Bvckup 2 Professional ($50) and ChronoSync ($50) for Mac.
There are other tools available, I have tested many of them, and these are the two I personally use and can recommend. These are not affiliate links and neither is or ever has been a paying sponsor. I have been a paying customer of Bvckup2 Pro since 2018 and if I decide to switch to Mac for my primary editing platform in 2021 (kinda likely with Apple Silicon) I will be a paying customer of ChronoSync.
Use The Cloud As Part of a 3-2-1 Backup of Photos
This is going to sound completely backwards and opposite to the recommendations I just outlined for local file cloning. I just made an argument for why photographers shouldn’t use backup software to do that local file cloning portion of a 3-2-1 backup. Now I am going to make my argument for the exact opposite and recommend backup software be used to automate the offsite portion of a 3-2-1 backup!
Remember that the “1” portion of a 3-2-1 backup means your photos have to be offsite. Having them on a third drive in your home is not adequate. That drive can be stolen with all of the others or you can have a disaster like fire/flood/earthquake destroy all of the drives in your home at once. To truly protect your images so that you won’t lose them a copy has to exist outside of your home or office.
I have already talked about the manual solution being a possibility here. You manually copy your photos to a third drive and then give that drive to a friend or family member for safekeeping. Your neighbor wouldn’t really be a great choice as their house has a good chance of being involved in the same disaster yours is. If you are going to go to all of this effort to do a manual 3-2-1 backup, go all the way. Don’t leave it with a neighbor that is close enough the same disaster that takes your house could take theirs.
For those like me who know they won’t be disciplined enough to take care of this manually, you need an automated solution. The obvious option for photographers that haven’t slammed into the second storage wall (we will get there next) is to clone your photos to cloud storage.
I recommend that as photographers automate their 3-2-1 backup using cloud storage they do so by configuring the software to backup the photos that go to drive 2 up to the cloud. There are two reasons for using drive 2 instead of drive 1:
- Accidental Deletion. It is not terribly hard to accidentally delete the files from drive 1 as you are editing photos. If you configure the software to clone your photos from drive 1 to the cloud it is possible you could accidentally delete the photos before they have made it up to the cloud. Sure, you could also delete them before they make it over to drive 2, but with the local file cloning software I have recommended it happens fast enough that isn’t likely. Cloud backup will go much slower, so do that from drive 2 where it isn’t as likely that you will delete them before they can be backed up to the cloud.
- Perfect One-Way Sync. If you follow my advice for the software that clones your photos from drive 1 to drive 2 then your photos are going to be cloned to drive 2 very quickly (probably before you have a chance to delete them from drive 1). Having the “verified copy” means you know drive 2 has a perfect copy of drive 1 as well, making drive 2 the best choice as the source to backup to the cloud.
Setting up the backup workflow this way, and getting the right cloud cloning software (see below), reduces a lot of the risks that photographers run into with their photos that causes them to be lost.
Don’t Use Cloud File Syncing Software
Following the theme throughout this guide, there are a lot of solutions to all of these problems and that is definitely true for using the cloud as part of your 3-2-1 backup. It may seem like software just like I recommended for the local file cloning would be ideal for the cloud file cloning as well. There are a lot of cloud storage products that can clone files from a drive to the cloud just like I recommended photographers should use to clone their photos from drive 1 to drive 2.
These are generically referred to as cloud file syncing solutions because they make sure every file you configure to be synced is copied from your computer to the cloud and to any other computer setup with your account. The major players here in Early May of 2021 include Dropbox, Box, Google Drive, OneDrive, Amazon Drive, and for photographers we can include Adobe Creative Cloud to some degree.
These products meet most of the same requirements I recommend photographers look for in their local file cloning software. However, I don’t recommend them as part of your 3-2-1 backup of your photos. There are two huge problems for me with nearly all of those cloud file syncing solutions in automating a 3-2-1 backup of photos:
- Limited storage size
- Extremely expensive
Nearly all of them offer a really small amount of storage for free, about 100GB or so. A lot of photographers have a single memory card larger than that (128GB). The free option is not viable for photographers, and the paid options for most of them aren’t sufficiently large. Most of these solutions max out at about 1TB for reasonable pricing. For some that is a hard cap where even if you were willing to pay more to get more storage you can’t. 1TB is just too small for most photographers.
I was actually a little surprised looking at the offerings here in early May 2021. A few of them offer more space than they did the last I had looked. I saw several that offer up to about 5TB, which would be great for most photographers. But that 5TB comes at a cost I think is unreasonable for most photographers. The 5TB offering is intended as a way to handle the storage needs of a small business with 5 employees all sharing that space. It is not intended for photographers to use it for backup of their photos.
To be fair, I did also see some of these cloud file syncing providers offer something they called “unlimited storage”. I have been doing this long enough to know that unlimited is never truly unlimited. Most of you listening have smartphones and can relate to what “unlimited” actually means there. I did a little searching and couldn’t find any information about what the term “unlimited” actually means here, but I don’t think it matters because the cost is so high I don’t think it is an option most photographers should consider.
Some photographers will have all of the images fit in that 1TB, reasonably priced tier. If that’s you and you don’t mind likely having to change cloud storage solutions when you outgrow these cloud syncing solutions, these are a great option. In fact, there is a massive advantage with these services as they can easily make all of your images be on all of your computers all of the time. That is very cool and exactly what Adobe is trying so hard to do with their Lightroom CC product offering.
If that is not you, you don’t want to switch or your photos already take up too much space, then don’t use cloud file syncing as part of your 3-2-1 backup.
NOTE: I know that Amazon Prime customers get free and unlimited backup of photos to their Amazon Drive. In fact, that free and unlimited even allows for the backup of many raw file types. I still can’t recommend that it be used for something as important as your 3-2-1 backup of your photos because the desktop software that copies your photos from your computer to the cloud is seriously buggy. Use it for a second copy if you like, or as a way to get images from your computer to your phone (handy) but pay for a proper cloud backup solution for your 3-2-1 backup.
WARNING: It is possible to sync your Lightroom Classic catalog using one of these cloud file syncing tools so that you have your full catalog on any computer you use as well, but it takes a great deal of care to make it work. Most photographers will end up corrupting their catalog doing this and I don’t recommend it. If you want this capability you should use Lightroom CC (also called Lightroom Desktop), though there are significant limitations in features and storage using that version of Lightroom.
How to Choose Cloud Backup Software
If cloud file syncing solutions aren’t the best option for most photographers, how should photographers choose software to automate the offsite portion of a 3-2-1 backup? I recommend photographers look for the following in a cloud backup solution:
- Runs in the background on the computer continuously (or nearly continuously as in multiple times a day or at least daily) monitoring for files that need to be backup up from drive 2 to the cloud
- The files are backed up in the same folder structure in the cloud as they are on drive 2.
- Only new or updated files are backed up from drive 2 to cloud. The software is smart enough to know that files that are already in the cloud and are unchanged on drive 2 don’t have to be backed up again. The software can also ignore files being deleted from drive 2 and not delete them from the cloud (often called one-way sync)
- The cloud provider offers multiple versions of the files (protects against ransomware)
- The software offers a way to limit how much upload bandwidth is used to send the file up to the cloud
- The software can backup internal AND external drives
- The cloud provider offers restoration of individual files through a web browser AND a way to pay for a hard drive with a full restore of your backup be mailed to you
Before sharing my recommendation on which cloud backup provider photographers should use, I want to quickly note here what your expectations should be for the cloud backup to complete. For most of you the expectation should be about a month per TB you need backed up. If it goes faster than that for you, great! If it goes slower, don’t be too alarmed as long as the software is reporting that it is making progress.
This is highly dependent on the UPLOAD speed of your Internet connection. A lof you listening won’t know what that speed is. Even if you are really happy with the speed of your Internet and think this should work fast, the reality is most of you have fast DOWNLOAD speeds and the UPLOAD speed is not nearly as fast, something like 1/10th of the download speed.
Additionally, it is likely that you may see the software working really fast initially, like about the first 7-10 days, only to have it slow down significantly after that time. Most Internet service providers recognize the destination of your data as heading to a cloud backup provider and to protect their network they lower the priority of your traffic. Again, don’t be alarmed if after a few days the speed of the backup slows down. Be patient and let it do it’s thing.
When I signed up with BackBlaze back in 2014 I had 6TB of photos to backup to the cloud and over my 5Mbps upload connection it took about 8 months for me to get that all backed up. I think the average upload speed is better than that here in the U.S. so that is why I estimate things at about 1TB per month as what you should expect.
You should be alarmed and reach out to both the company that provides your Internet and to the company that provides your cloud backup if you aren’t seeing even a 1% improvement over a 24 hour period.
For those who don’t want to go looking for a solution that meets these requirements, there is only one solution I can recommend here – ($72/year).
BackBlaze is not and never has been a paying sponsor. I am a paying customer of the service and have been since 2014. For photographers who have not hit the second storage wall I recommend the annual Personal pricing for $60/year plus the 1-Year Version History add-on for $2/mo.
With that pricing BackBlaze allows you to backup every drive in your computer, and every drive connected to your computer (external drives), with one exception – NAS/RAID. You can still use BackBlaze with NAS/RAID, but it is more expensive and we will get to that later. With this pricing BackBlaze also requires that the syncing software see the drives you are backing up at least once a year (with that $2/mo add-on, the default is 30 days). If you don’t connect the drive to your computer within that year then the backups for that drive are deleted in the cloud.
There are other cloud backup providers, but I have seen so many come and go that I can’t recommend any others. Have a listen to the Online Backup podcast episode I did back in 2017 with Jim Goldstein, Directory of Marketing and former professional photographer at BackBlaze at the time, to get an idea of why I think they will be around for a long time.
The Second Storage Wall For Photographers
Now that we have gone through that first storage wall that nearly every photographer slams into, let’s talk briefly about the second wall. Slamming into that first storage wall for photographers is rough, but the second wall is even worse because there aren’t great solutions here in 2021.
The second storage wall photographers slam into is reaching the point where they fill up the external drives that are part of the editing process and the 3-2-1 backup solution. What are photographers supposed to do at that point?
There are two options to deal with filling up the external drive:
- Kick the can down the road and buy bigger external drives.
- Buy a NAS/DAS RAID system.
Second Storage Wall Solution #1 – Bigger External Drives
Fortunately, the capacity of external drives has continued to increase over time, making buying new external drives with more capacity a viable solution to this problem. You could start off with 2TB drives, buy 4TB drives when they fill up, then go to 8TB when they fill up, all the way up through 16TB drives available today (at high cost).
This is the strategy I have been using for nearly a decade now, but the way I stated it above is extremely accurate in that this is really only kicking the can down the road rather than doing the real solution which is buying a NAS/DAS device.
Before we get into that solution, I want to make it clear that I don’t recommend photographers add new drives to their photography workflow. When you fill up the 2TB drives I don’t recommend you buy the 4TB drives and then store photos on both of them. No, I recommend photographers look at buying the new drives as something they are doing to REPLACE the old drives.
There are two reasons I recommend that the new drives replace the old drives and you stop using the old drives in your photography workflow:
- Drives have a limited lifetime. They will all fail (even SSD) and you really should replace them every 3 years to avoid having a failure.
- It is really hard to manage multiple primary drives (drive 1). Hard to know which photos are where. Even worse, you can’t really do an effective 3-2-1 backup with multiple external drives beyond the drive 1 and drive 2 solution I have outlined.
Let’s walk through the 2TB drives getting full and replacing them with 4TB drives as an example:
- Disable your cloud backup software
- Disable the local file syncing jobs that clone from drive 1 to drive 2
- Disconnect the 2TB drive 2, leave the 2TB drive 1 connected
- Connect the new 4TB drive 1
- Clone the files from 2TB drive 1 to 4TB drive 1 (use the same local file cloning software you have been using between drive 1 and drive 2 to do this, with verified copies enabled)
- Disconnect both the 2TB drive 1 and the 4TB drive 1
- Connect the 2TB drive 2 and the 4TB drive 2
- Clone the files from 2TB drive 2 to 4TB drive 2 (use the same local file cloning software with verified copies enabled)
- Disconnect 2TB drive 2.
- Connect 4TB drive 1 (should now have both 4TB drives connected)
- Change the local file cloning software to clone from the 4TB drive 1 to the 4TB drive 2. Let it complete a full sync (should go fast with nothing to sync).
- Change the cloud backup software to backup from drive 2
This is quite a bit of data here and with verified copies enabled it will take some time, so don’t start on this an hour before you have to process a shoot. Give yourself at least a day of downtime to work through this where you won’t be doing anything else with the photos while it is happening.
Second Storage Wall Solution #2 – NAS/DAS (RAID)
Photographers can kick the can down the road for a long time before having to go here, but eventually there won’t be big enough drives to continue using external drives. Honestly, I don’t think photographers should wait until they get more than 16TB of photos to do this, they should think about investing in NAS/DAS around the time 10TB or larger drives are needed, but that will be something you have to decide.
Let’s define NAS/DAS. Both are physical devices that have slots where multiple hard drives can be installed. The device makes those drives look like one big drive to your computer. You will probably know what I am talking about as soon as I say Drobo is such a device, but there are many vendors who sell these kinds of products.
NAS stands for Network Attached Storage. DAS stands for Direct Attached Storage. They both do exactly the same thing in making multiple drives look like one big drive to your computer, with the difference being the way your computer connects to the device. With NAS you computer uses a network connection (Ethernet and/or WiFi) to connect to the drives. With DAS that connection is a USB or Thunderbolt connection.
Choosing Between NAS or DAS
There are pros and cons to both types of devices. Most of the time photographers make their choice between NAS or DAS based on other purposes. Here are a few things photographers should consider when choosing.
Choose NAS when:
- Needing a less expensive solution
- Connecting the device to more than one computer
- You want to use the storage (or a portion of it) to backup all of the computers in your home/office
- You want to share media (photos/movies) to all the computers in your house
Chose DAS when:
- It will only be connected to a single computer
- Performance is critical (video editing). DAS can be as much as 4x faster than NAS.
Either type of device will really help any photographer with drive space for their photography workflow.
Recommended NAS For Photographers
My personal preference to overcome the second storage wall is NAS. So long as you have a fast wired Ethernet connection (see the note below), NAS provides enough performance for photo editing workflows and NAS devices are more useful. I have multiple computers in my house and I share media over my network.
There are a lot of solid NAS choices out there, so you can do some price shopping to see which is going to work best for you as long as the device meets the following requirements:
- 1Gbe (Gigabit Ethernet) ports. 10Gbe is too expensive and 1Gbe provides enough speed for most photographers.
- 5 or more 3.5” bays
- Support RAID levels 5 and 6
- 4GB or more (preferably 8GB) of memory
- M.2 SSD slots a plus, but not required.
If I were buying a NAS today it would be the Synology DiskStation DS1520+ 5-Bay NAS Enclosure for about $700 (Adorama affiliate link). Yikes! $700? Yeah, this is expensive, and that is only for the cost of the enclosure without any drives inside it. You still have to buy drives to put inside of that. This is one of the reasons most photographers should probably just upgrade their external drives a few times as their storage needs grow and kick the can down the road.
NOTE: Using a wired connection to the NAS will ALWAYS be better than WiFi. I don’t care if you have a really expensive WiFi device, wired wins. To get the most performance out of the NAS you should have at least a 100Mbe (megabit or 10/100) Ethernet connection wired to the NAS device. If you aren’t sure what you have then look at buying a 1Gbe (gigabit or 10/100/1000) adapter for your computer. For current PCs and Macs that have USB-C ports, I would choose this J5 Create JCE133G USB-C to Gigabit Ethernet Adapter for about $30 (Adorama affiliate link). There is 10Gbe ethernet available, but the costs are so much higher for a NAS it is not worth the investment for photographers here in 2021.
For hard drives that go in a NAS, photographers should look for the following:
- Drives made for NAS, should be easy to find in the description that it is a NAS drive
- CMR (Conventional Magnetic Recording), sometimes called PRM (Perpendicular Magnetic Recording), rather than SHR (Shingled Magnetic Recording). If the description/technical specs of a drive don’t say if it is CMR/PMR or SHR then the price will be a good indicator. If the drive is significantly less than a similarly sized drive from another manufacturer, it is probably SHR and you should avoid it.
- 7200 RPM. Not the end of the world if the drive is lower RPM, but the best performance will come out of drives that are 7200 RPM (or higher, though probably not worth the cost for higher).
- Start at 6TB drives to populate the NAS. Drives smaller than that will give you a total drive space of less than what you can easily get in an external drive
- Buy all the same size
Check out this Hard Drive Buying Guide from BackBlaze for more information.
If I were buying drives to populate the Synology NAS recommended above I would buy 5 of the Seagate IronWolf 6TB NAS Internal Hard Drive – CMR 3.5″ SATA 6Gbps, 7200 RPM for about $140 each (Adorama affiliate link). I want to be clear that Seagate isn’t a preferred brand here, just happens to have the best price on drives that meet those requirements right now. Anything from the list of the major drive manufacturers above would work so long as the 4 requirements are met.
Yes, that means spending about $700 on drives to go in the $700 Synology, totalling $1,400. Double ouch! See why photographers opt to buy two external drives for quite a while? Much easier on the bank account to spend less than $500 and kick that can down the road a while. Just don’t plan to do that forever, especially if you do video editing.
Recommended DAS For Photographers
If DAS is what you are after you may think the obvious choice would be Drobo. Drobo makes a decent product that photographers are likely to be pretty happy with, but I have heard from so many who have had issues with them that it is not my recommendation.
I am not guaranteeing you have problems if you go with Drobo. If that fits you better for whatever reason (maybe a friend can help you with it), then go for it. Just configure it like I recommend and off you go!
My DAS recommendation comes from photographers who have years worth of real-world experience with these kinds of systems. Most of them are choosing NAS over DAS for the same reasons I am, but the DAS I have been pointed to most is the Promise Pegasus line.
If I were buying a DAS today I would choose the Promise Technology Pegasus32 R6 24TB Thunderbolt 3 / USB 3.2 Gen 2 RAID for about $2,200 (Adorama affiliate link).
Triple ouch on the cost! The good thing is this device comes pre-populated with 24TB of usable storage, so you don’t have to buy drives or configure them. DAS is nearly 2x as much as NAS, but that’s the price you pay for about 4x performance.
Recommended RAID Configuration For Photographers
Unless you go with Drobo (you only get their proprietary Beyond RAID system), it doesn’t matter if you invest in NAS or DAS, you need to make sure either is configured to protect your photos. There are two SUPER IMPORTANT things photographers need to understand about configuring NAS/DAS:
- RAID is NOT your 3-2-1 backup. RAID should not be considered any more than a single copy of your photos.
- If too many hard drives fail in the NAS/DAS, you lose EVERYTHING that was on them.
See Photographer’s Guide to RAID for the nitty gritty details, but the short answer for how photographers should configure the NAS/DAS to best protect their photos is RAID 5 or 6. Even though the configuration is supported, photographers should avoid RAID 0,1, and 10 as well as JBOD like the plague.
RAID 5 and 6 are standards that have been around for decades. There isn’t any mystery there and these devices all support both configurations really well. Here is how photographers should choose between RAID 5 and 6:
- More usable storage (less cost) with the risk of losing all data when more than 1 drive fails – RAID 5
- Less usable storage (more cost) while having your data survive with up to 2 drive failures – RAID 6
I recommend RAID 6 for most photographers, but if budget is really an issue then go RAID 5. With either configuration you should have an extra drive on hand to replace one that fails or order a new drive AS SOON AS YOU SEE A DRIVE HAS FAILED.
What about proprietary formats like Drobo’s “Beyond RAID” or Synology’s “Synology Hybrid”? These systems are specially designed to make the most out of the storage automatically and allow for disks of different sizes to be used. They also allow for drives to be added at any time.
I don’t recommend them, but they aren’t so bad that they make the avoid like the plague list. If you have an extreme failure you MIGHT have some options if you use RAID 5 or 6. Including something like the NAS/DAS device itself failing. Using a proprietary configuration (especially with different drive sizes) increases your chances of losing all of your data when recovering from a NAS/DAS failure (none of the drives failed).
RAID In a 3-2-1 Backup of Photos
Whew. You made it to the end! Talking about how RAID fits into a 3-2-1 backup of photos is the final topic, and it is a tough conversation. There aren’t great ways to do a 3-2-1 backup with a NAS/DAS RAID system here in 2021.
Many photographers point to the RAID and say that with RAID level 6 you have 3 copies of your images because it is on three of the drives. While true, and you can lose up to 2 drives and still keep your local data, it shouldn’t count for any more than a single copy of your photos.
The best solution is to mirror what I recommended with doing a 3-2-1 backup with external drives. Meaning you buy two of the RAID devices, one being drive 1 and the other drive 2. The same file syncing software can still be used to do the local file cloning (your computer just sees the RAID as a big drive).
You also need to backup to the cloud, which means a more expensive backup license but it can be done from the “drive 2” RAID. BackBlaze is still the option I recommend for this backup solution, but instead of a fixed cost for unlimited backup you will now have to license B2 Cloud Storage. BackBlaze B2 Cloud Storage costs $0.005/GB/mo for storage (about $120/mo for a 24TB RAID) and $0.01/GB to download the data should a restore be necessary (about $240 for that 24TB RAID).
All of this is quite the hit to the wallet! When I reach the point where I am finally investing in RAID myself there is no way I can swing buying two of them. That just isn’t going to work for me. At that point I will have to opt for a 3-1-1 solution. I will have my photos in 3 places, 2 of them on the RAID (cheating) and 1 in the cloud.
I’ll be super diligent about having extra drives on hand to replace failures immediately. I will also diligently replace the drives every 3 years, which will be painful.
Reminders
- Find Jeff’s work at https://www.jsharmonphotos.com.
- Check out his Master Photography podcast over at https://masterphotographypodcast.com where you can search all kinds of topics and find shows discussing the details.
- He is on Facebook: https://www.facebook.com/harmon.jeff, Instagram: https://www.instagram.com/harmonjeff/ (@harmonjeff), and Twitter: https://twitter.com/harmon_jeff (@harmon_jeff)
Podcast: Download (Duration: 2:27:42 — 102.3MB) | Embed
Comments
Jeff,
I listened to your entire epic podcast yesterday and I want to thank you for all of your hard work researching and creating this valuable piece of information. I would also like to offer Microcenter as an excellent source for all things computer. There are more that 20 stores across the country and of course online sales. Their web site is amazingly detailed when it comes to the technical specs. http://www.microcenter.com I am just a paying customer.
Thanks again,
Nice job! I too have an IT background – worked at Data General when the Clariion disk array came out in the 90s – got one of the first ones on a server I was in charge of and we pulled a disk out to demonstrate that we could.
I’m pretty geeky about backup, but don’t yet have such a huge catalog. Some differences in my strategy:
I keep two tiers of images – tier one is as much as I can fit on my internal drive that are current – anything that won’t fit goes to an external drive – so my older files are just a little slower.
Then I use Carbon Copy Cloner – have had good luck with it.
I do three compete backups of both my internal drive and my external drive.
Two of those backups are live here in my house.
About once a month I take one of those backups to a safe deposit box and swap it with another backup set – so if I have a disaster at home I’m only going to loose about a month of images.
I also use Google drive for my cloud – I agree with your analysis of the shortcomings, but I feel my safe deposit box is a good compromise.
One thing I’ve learned is that files go bad on the local drive and you don’t know they did. Carbon Copy Cloner does not detect that and I doubt your solution does – but maybe I’m wrong. So on a very irregular basis I run a completely fresh clone with CCC – CCC reports files on my internal drive (or external drive) that it could not copy. Then I run through one of my clones, replace the bads with goods and I’m back on track.
Jeff,
What an huge undertaking on this! Bravo for a job well done, this was really quite helpful and a much-appreciated update and synthesis of your past work on this issue. Thank you so much, it’s all truly appreciated!
I believe you said one of the bad things about Drobo is you can’t set-up
disk redundancy. Yes you can… in Dashboard click on the Drobo and go to settings…I have mine set up so two disks could fail and I wouldn’t lose any data.
DroboDashboard(settings).jpg Oops can’t paste a photo
Mel Stone
listen to the show all the time
No, I didn’t say no redundancy. I said you only get to choose BeyondRAID as the system. You can’t choose RAID 5 or 6
Mine is set so 2 disks can fail; isn’t that basically RAID 6?
Same end result but not the same tried and true system for doing it. I really don’t like BeyondRAID. So many have let me know how it has failed them, like a Drobo level failure (not drive level) and putting the disks in a new device in the same order still lost everything. I also don’t recommend the proprietary systems from other vendors like Synology.
Great information. I wish it had appeared 2 weeks ago – I just spent a chunk of money on storage and backup and it looks like I wasted a bunch. I jumped down the road and got a NAS on the advice of my tech advisor, but it must be connected to my router and my computer connects via wi-fi. I guess that will be too slow and your previous podcast on RAIDs says an ethernet connection will also be too slow. Ouch! I also bought a 12 TB hard drive (NOT SSD) to serve as a backup and it connects directly to my computer. Do you think it would make sense to use that drive as my primary drive and use the NAS for backup. Because it connects directly to my computer, it should be faster, right?
Unfortunately, while setting up the above my computer may be been killed (long story). Can you point me to a source of advice about the perfect PC computer for photography?
Thanks again for all your great podcasts. I especially appreciate your research focus.
@David,
I would be surprised if you couldn’t do a wired connection to the NAS and if you use a 1Gbe connection that should be fast enough for photo editing.
That is especially true if you do as you suggested and use the 12TB USB drive as drive 1 (primary) and the RAID for drive 2 (clone).
Many thanks, Jeff. Once I get backup4all working right I’ll turn to the wiring. Never a dull moment!
As to a computer recommendation, PC or Mac?
Thank you for the hard work that went into to producing this definitive resource on storage and backup. I’ve used Backblaze for cloud storage since your last 3-2-1 backup podcast and I’ve just started my 2-week Bvckup 2 trial based on your most recent recommendation. I have two WD 2TB external drives and until now have been manually copying files from the primary to the backup drive. It will be nice to have an automated process moving forward.
Might I impose on you to provide a recommended configuration to use in Bvckup 2? Specifically, I’m interested in recommended settings for Detecting Changes, Copying, Deleting, Processing, and “More Options.”
Thank you again for sharing all this great information!
This is great! I believe photographers will find this helpful. Thank you! Quick question – Is it important to keep half of an external drive’s space clear? I remember photographers saying years ago that performance will start to slow down significantly if your drive is half-full or more. Perhaps this only applies to certain types of drives? If so, this may be a factor when purhasing a drive. Any thoughts? Thank you for the great podcase, Jeff!
@Glen,
That advice remains good for today and actually for all drive types. None of them like being close to full. I think you can go over half though, more like 75% full.
Thank you, Jeff! This is helpful.
Thanks for all your hard work. I’m just listening to this podcast because my photography has been on hold for to last 20 months. Your ideas for doing one-way sync and using drive two for backup were new to me. Thanks. I guess the one good thing about starting serious photography later in life and basically shooting landscape and travel, is that I only have about a terabyte of images now. I think I’ll be able to kick that can down the road till it changes into a bucket. 😂
Thank you Jeff!
I have been struggling with back up problem ever since my first disk crash.
The 3 tier back up scheme is complicated but you put in a digestible explanation.
I back up my primary file storage drives containing photos (Lightroom and Catalog), files, mail, other document to one large external 4 Tb G-Drive (7200 rpm) attached to my desktop (Puget systems configured for Lightroom). I use Backup ( elegant, straight forward software-Thank you!)
The 3rd tier is periodic scheduled backup to iDrive in the cloud. (Took 2 weeks to complete initial upload)
Everything is so much easier.
Thank you! Have a Diet Coke or two on me!
I just listened to this all the way through and like your system. You mentioned that you could put out notes or directions on how to get the second disc backup set up and the cloud system backed up in the way you described. I cant find anything about that on here, can you direct me to it? Id love to backup like that but dont have the technical backgound to figure that out just yet.
thanks a lot, enjoyed the show!
@Pete,
I haven’t done that yet. I have so many articles and episodes I need to do!
Huge thanks for the detailed and comprehensive post, it’s super helpful! I am trying to understand what would work for me and how to actually implement what I want, and your article is just what I needed.
Do you backup your computer (OS, settings, apps, app settings etc)? Do you have a backup in a sense that you can restore the whole disk from it and the system will be just as it was before the crash? If yes, do you follow the 3-2-1 strategy for those backups as well?
Which software do you use to back up internal and external hard drives to BackBlaze? Or does BackBlaze provide the software?
How does your backup workflow look in practice? Do you have the external drive connected to the laptop all the time? Does the backup software slow down the laptop in any way? And what happens to the files that you’re actively working on (e.g. photoshop edits), how are those handled by the backup software?
If I configure one-way sync, how should I delete the files that become obsolete? I typically keep most of the photos from a shoot for up to 1 year, and then delete everything apart from the “keepers” (typically using filters in Lightroom). The reason is that I do come back to old shoots sometimes 🙂
I’d prefer to have one-way sync to make sure I have files backed up even if I accidentally delete some. But, when I do the cleanup, I actually want to purge the files from all places — local, external and cloud. Maybe it’s a bit silly question, but I don’t have any experience with backup software and I genuinely don’t know how to organize this process effectively. Any help is much appreciated!
@Tetiana,
Yes, I backup my computer and settings as well, but I view that very differently and so it was not covered in the article. I don’t employ a 3-2-1 backup for that because if the worst happened and I lost the internal hard drive where my operating system is installed AND the one backup I have made, it would be inconvenient but I could still recover things manually. I could get a new drive, re-install the operating system, re-install my applications, and not lose anything but my time. That can all go a little bit faster if you have a backup you can restore from, but should that backup also fail it should only cost me time.
As mentioned in the article, there are two levels of “backup” I do to implement the 3-2-1 backup for my photos. I use “sync” software to mirror from one drive to another. This gives me the 2 from the 3-2-1 as all of my photos will be on two different drives. Then I use “backup” software (yes, BackBlaze is specifically what I have been using for several years) to give me the 3 and the 1 with having my images on a 3rd drive and it is offsite as it is in the cloud.
The workflow is pretty detailed in the article. If you read through it all the way through that should be pretty clearly outlined, let me know if you have specific questions about the workflow.
Deleting the files with one-way sync is something you would have to do twice if you do decide you no longer need the files. This is my recommendation very much on purpose because I want to have protection against accidental deletes. I want it to be that I have to REALLY mean it if am I going to delete my images and be forced to do that on both drives in order to actually get rid of them (I will still have that 3rd copy in the cloud where I never delete them because the storage is inexpensive). You won’t be able to do that delete on the second drive from Lightroom. One approach to do that then would be to temporarily change the sync to be a full sync, do your Lightroom delete, then then switch it back.
I personally don’t replicate my deletes to the mirrored drive nor cloud storage. Storage is inexpensive, I have been able to grow it for nearly a decade now to have it not be a problem. If it reaches a problem then I know I can do that full sync once from the source to the mirror drive.
Can you please clarify how to detect if a file became corrupt? I wouldn’t want a corrupt file to override a good version of this file on the back up drive. But I may not know that it is corrupt, and I’ve no idea whether the backup software detects that somehow.
@Tetiana,
You really can’t tell a file or backup has become corrupt until you try to use them. Though you can get close with verified copies. To have they very best chance of having files replicated across drives and not risk corruption, a verified copy means the computer will checksum the original file, checksum the copied file, and only consider the file to be successfully copied when the checksums match. That validates the every bit and byte of the file made it over to the other drive. Most sync software offers a verification step, and backup software should be doing this by default.
I have listened to this podcast and read the notes, as well as coming back to read sections. First I must thank you for the help that this podcast gives.
I have hit a wall (or about to). I have 3 Tb of storage in my computer. I have consulted with a “computer guy” and he tried to add storage but has come to the conclusion that there just isn’t enough pout in my HP computer to add additional drives. (he has added several different sizes and the drives won’t spin at all). My computer indicates that I have about 2100 photos all of them are RAW files. I have someone tell me that this doesn’t sound like it would fill up 3 Tb. I don’t know of any other thing on my computer that would be that big. I have some documents and maybe 5 short videos of grandkids.
Before I start adding external drives I want to make sure that I have actually filled what I have. My C drive is a SS drive. It has 285 Gb free of 475 GB. My D drive has 92.1 free of 2.72 Tb. Please tell me if I am on the right track for the “next step” of external drives that you describe in your podcast.
Pingback: Photographer's Guide to Buying 2022 Mac Studio - Photo Taco Podcast
I bought the software ChronoSync, and saw that is has different settings for backing up/mirroring. Which one did you suggest again? Backup Left to Right, Mirror Left to Right, or Blind Backup Left to Right (Left being my Drive 1 and Right being my Drive 2). Thank you for all you do.
Thanks for all your hard work on this one. Have you had a chance to produce your “ChronoSync” instruction sheet for setting this up for those of us who are less technologically savvy?
Thanks